
Getting started
Show me around Didyma
Follow the complete workflow from creating your first client to finalizing a financial statement.
Didyma brings client records, source documents, financial data, review work, and final reporting into one workflow. This tour follows the same path as Show me around the app.
Before you start
You need permission to create or access a client. To import directly from accounting or document-management software, an administrator may also need to configure the relevant integration.
You can still complete the workflow with file uploads when no accounting integration is connected.
1. Create a client
Open Clients, then select Create Client. Enter at least the client name. For a Swiss business, type three or more characters to search Zefix and select the matching active company. Didyma fills the available registry details for you; review them before creating the client.
You can also enter the client manually. Choose whether the client is visible to All members or a Limited set of users, then select Create.
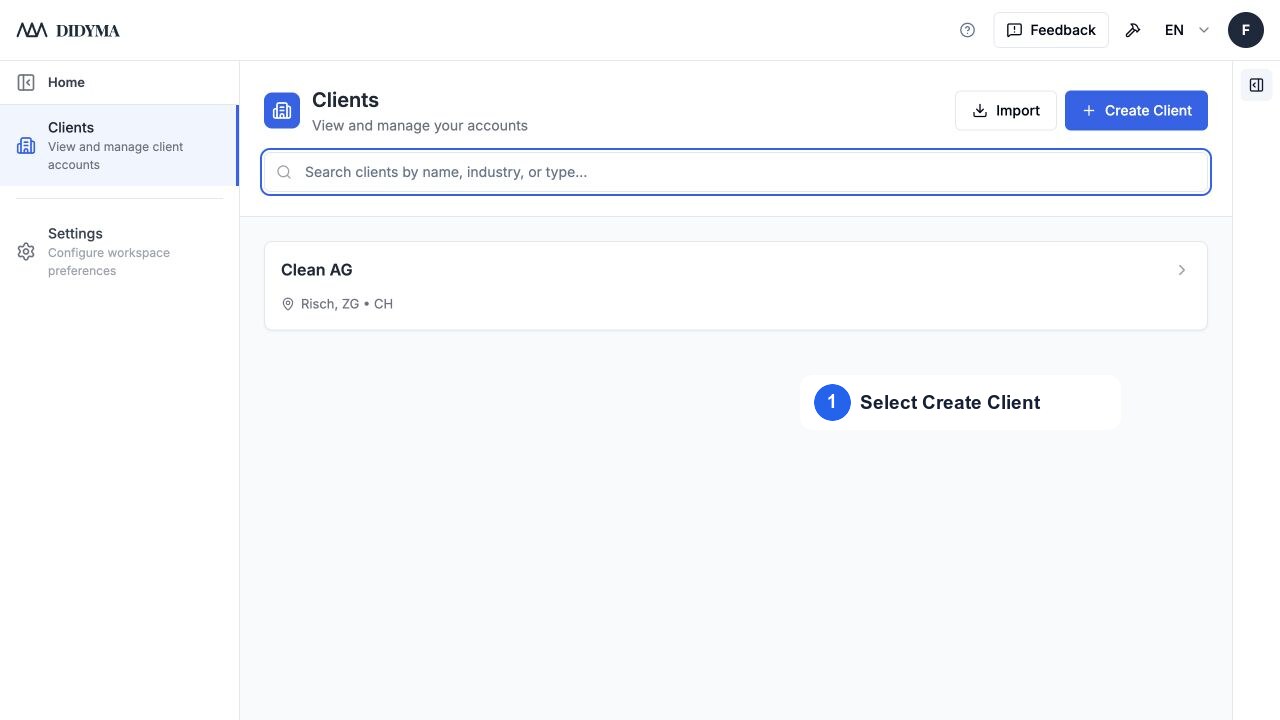
Screenshot: Open Clients and use Create Client in the upper-right corner.
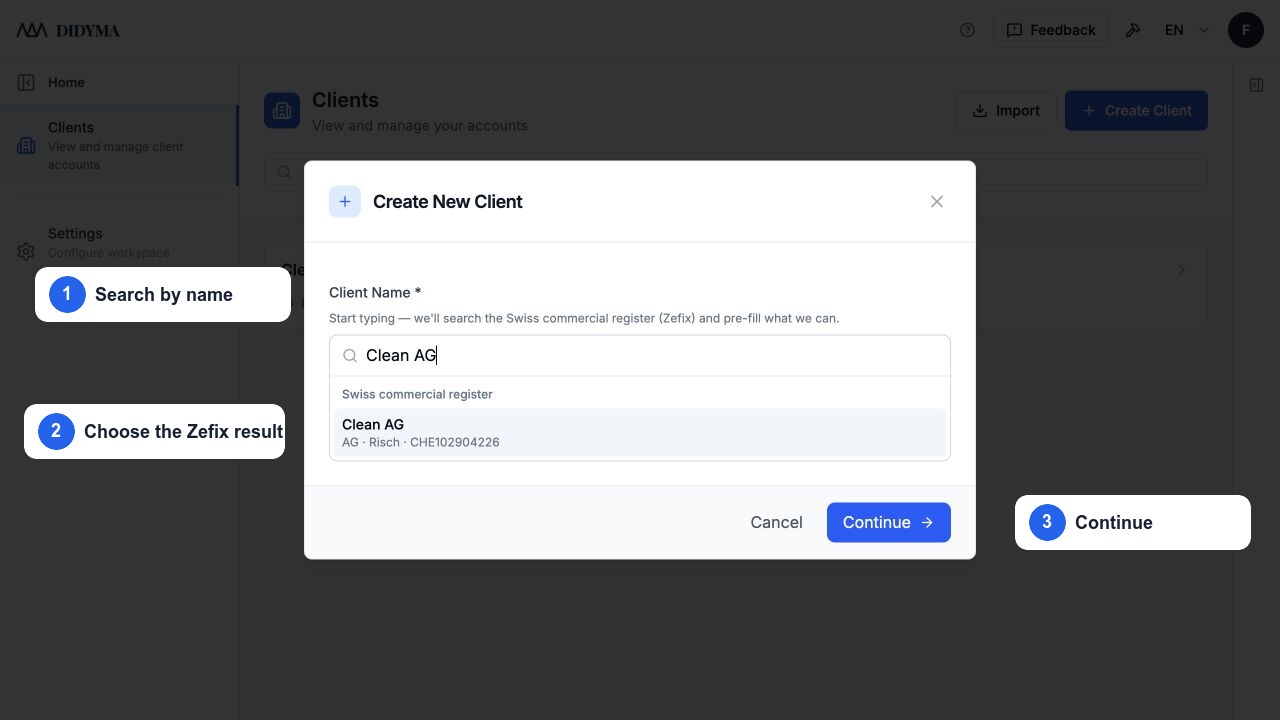
Screenshot: Select a Zefix result to prefill the available company information.
For every option, see Add a client and How the Zefix integration works.
2. Add the source documents
Open the client and go to Documents. Use the amber Upload documents for the financial statement flow area, or open Actions and choose Upload Files or Upload Folder. You can also drag files into the workspace.
Build folders that match the engagement and reporting period. Documents placed in the workspace can be reused later in Year-End Close, including as checklist evidence and as supporting files in the compliance pack.
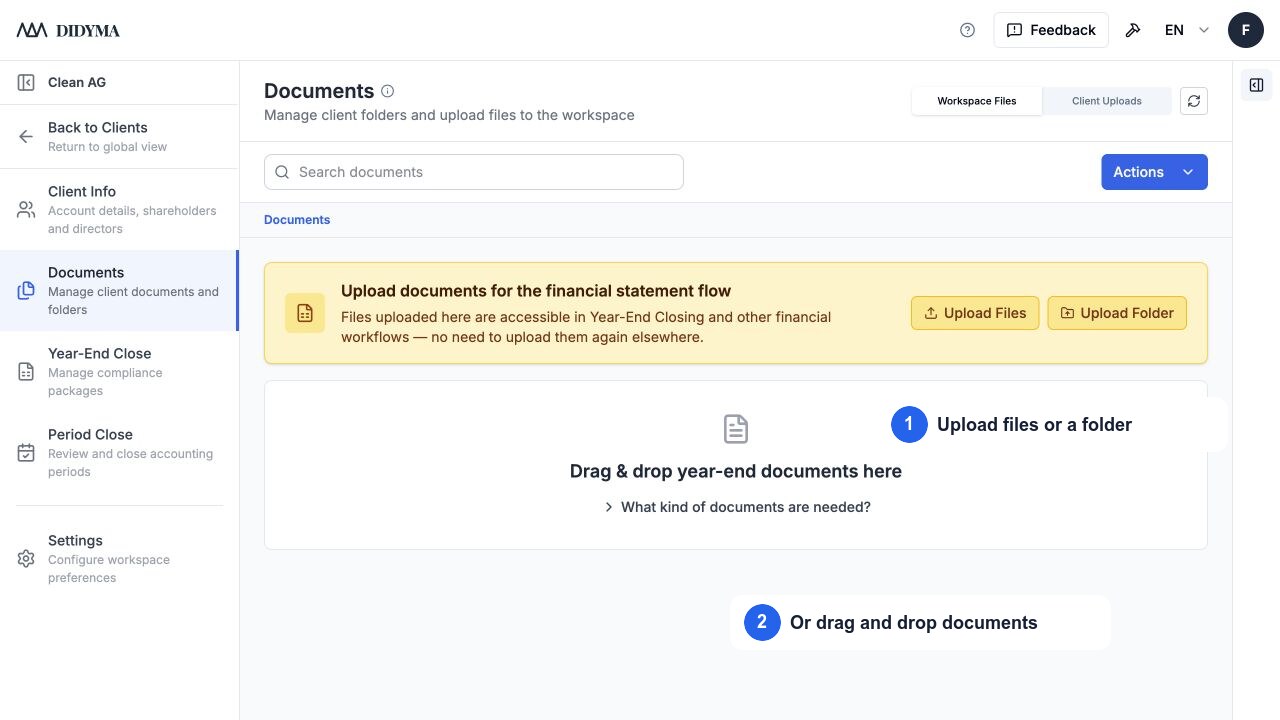
Screenshot: Upload files or a folder in the client Documents workspace.
Read Upload and organize documents for folder uploads, duplicate-file choices, M-Files behavior, and client-uploaded files.
3. Create the financial statement
Open Year-End Close for the client and select New Form. Choose Financial Statement, then set the Tax year, Label, and Reporting date. If the reporting period is longer or shorter than a normal year, enable the corresponding option and enter the Start date.
If a compatible finalized statement exists for the preceding year and rollover is enabled for your organization, you can also choose to roll forward prior-close data. Always review rolled-forward information in the new period.
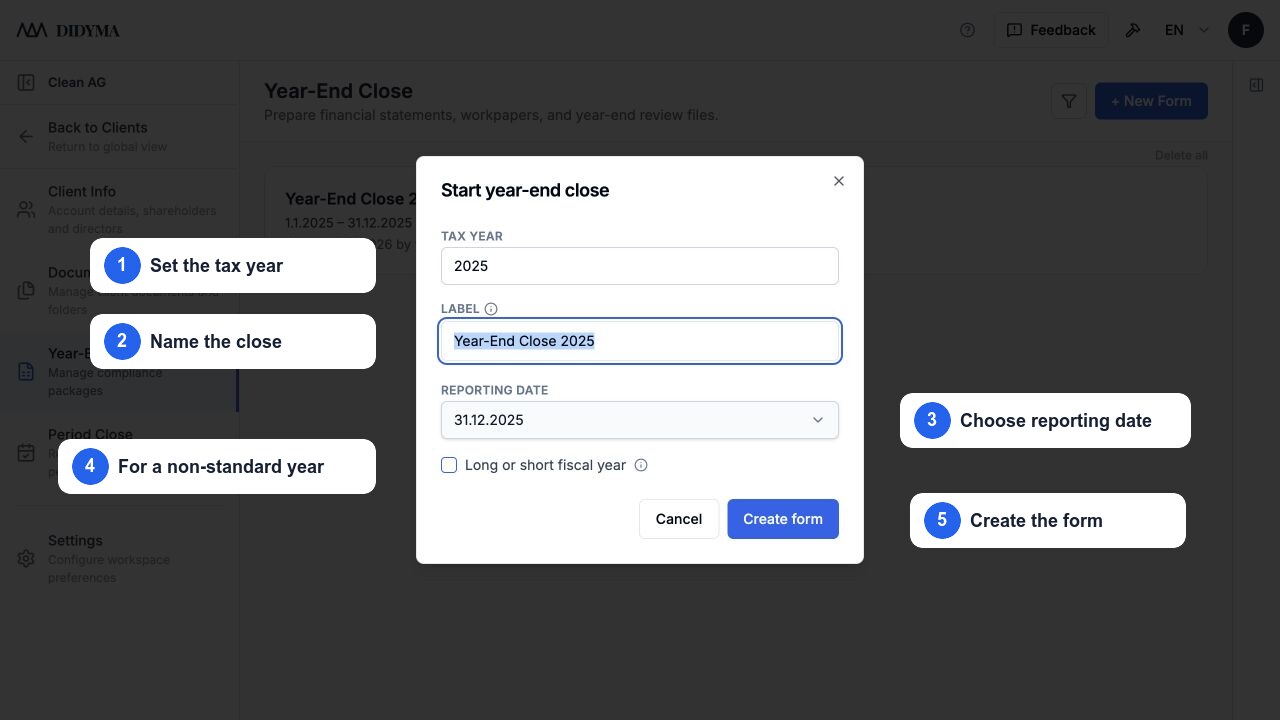
Screenshot: Set the tax year and reporting period before creating the statement.
For field-by-field guidance, see Create a financial statement and Use a prior-year rollover.
4. Import the accounting data
Start at Import. A linked system such as Abacus or Bexio may appear as a direct source. Otherwise, use the file-import option and supply the current and comparative period data requested on screen.
Didyma works with both the current and prior period so you can review comparative figures. The exact files depend on the source; follow Import financial data before exporting files from the accounting system.
5. Work through the statement
The normal sequence is:
- Import the accounting data.
- Use Verification, when enabled, to check the extracted accounts, currency, and period values.
- Complete CoA Mapping to map source accounts to the Swiss SME chart of accounts.
- Use Review to assess the financial statement, materiality, and comments.
- Complete the Checklists and attach the necessary evidence.
- Generate and edit the Report.
- Build the compliance pack and Finalize the statement.
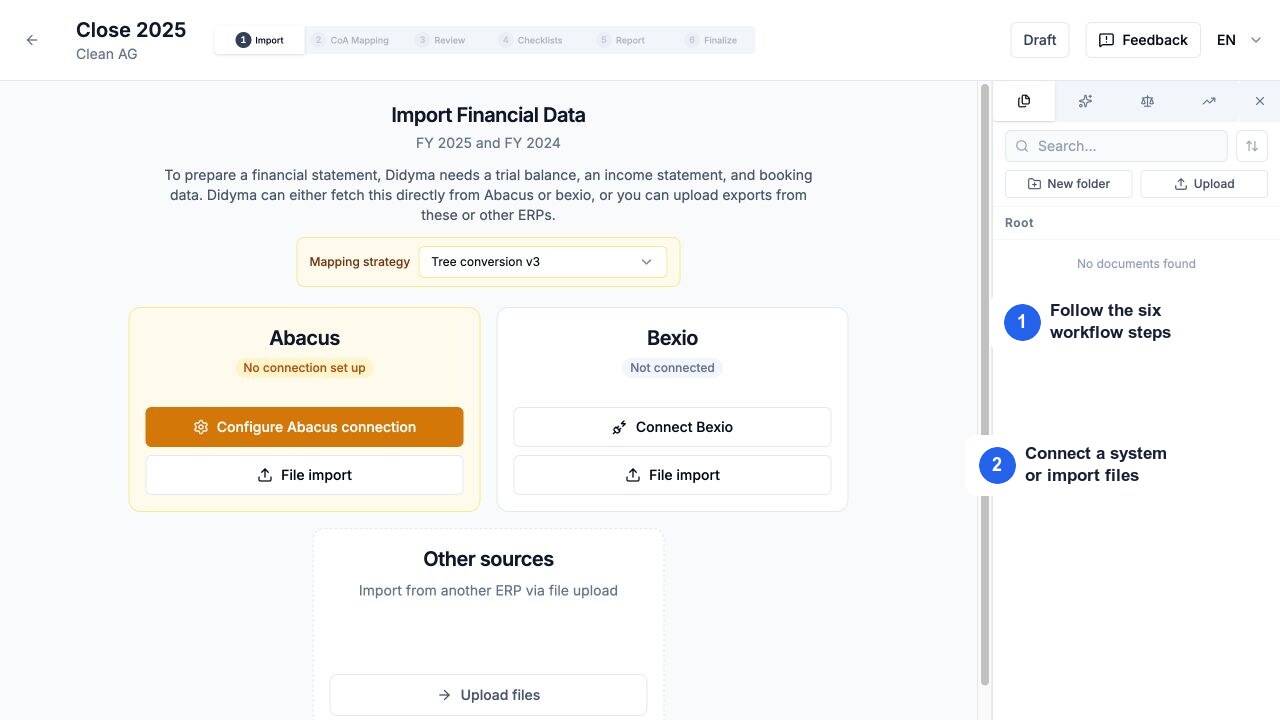
Screenshot: Move through the financial statement steps from Import to Finalize.
Some organizations do not show every optional step. Understand the statement steps explains what each one is for.
6. Finalize only after review
Generate the report and review the final numbers, disclosures, checklist status, and supporting evidence. In Finalize, create and inspect the draft compliance pack before selecting Finalize Statement.
Finalization locks the statement against further editing. If a change is needed later, use Clone from the form list to create a separate editable copy while preserving the finalized version. See Finalize a statement and build the compliance pack.